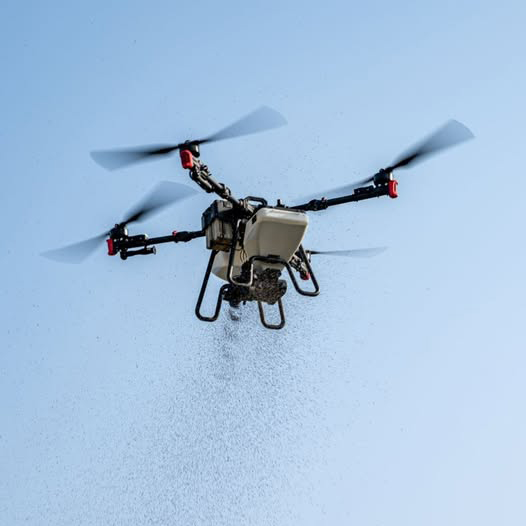


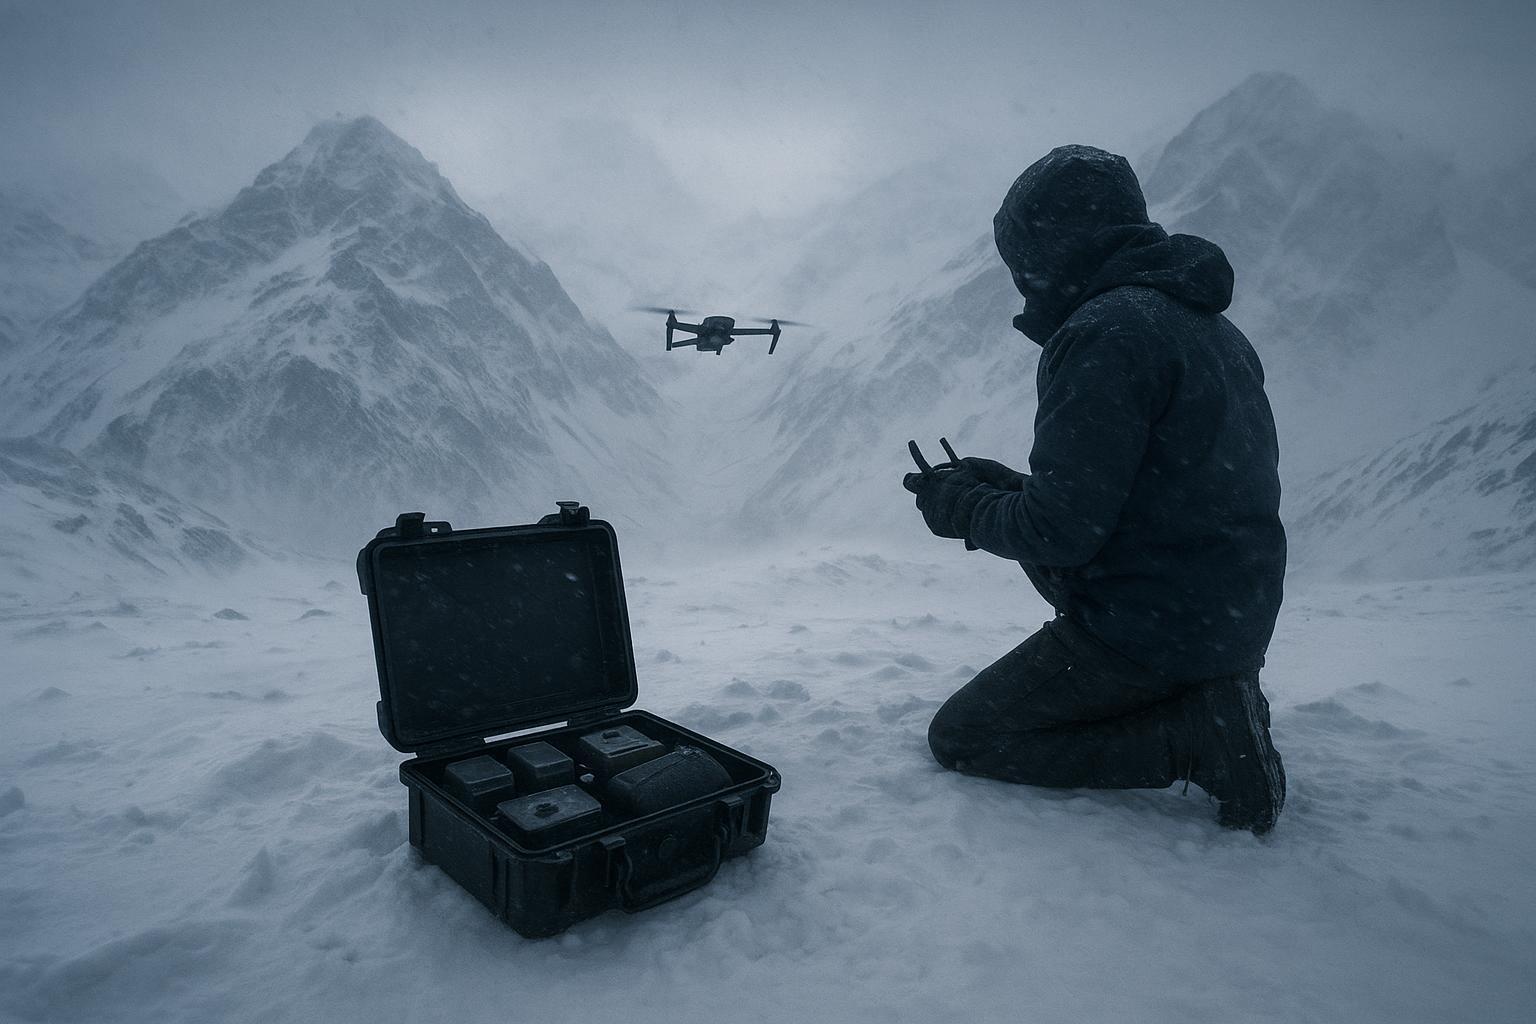
Winter snowfields and high-altitude ridgelines can be premium aerial photography and inspection environments. They’re also the conditions most likely to expose a lithium battery’s weakest point: voltage sag under load.
In cold weather (low-temperature air + wind), drones don’t usually “run out of battery” in a smooth, predictable way. Instead, you see sudden endurance collapse, fast percentage drops, and in the worst case a forced return-to-home or shutdown triggered by undervoltage protection.
This guide is written as a consideration-stage SOP for polar/high-altitude fleet leads: the goal is repeatability, clear go/no-go criteria, and fewer incidents caused by a cold weather drone battery that can’t hold voltage under load—plus a few practical notes on flight control choices that reduce current spikes when the pack is most vulnerable.
Principales conclusiones
-
Cold conditions reduce both usable energy and, more importantly, power delivery (voltage under load). That’s why you can see sudden drops or shutdowns even when battery percentage still looks “okay.”
-
The most reliable field approach is a four-step SOP: preheat → insulate → fly gently → monitor.
-
Practical temperature targets: preheat to ~20–25°C (68–77°F) and follow your OEM minimums (commonly >15°C / 59°F for takeoff). Avoid any method that could create localized overheating.
-
Mission planning rule of thumb: in freezing conditions, plan ~60–70% of your mild-weather flight time as a starting point, then adjust based on your airframe, battery chemistry, payload, and wind.
-
High altitude increases current demand (higher “density altitude” = less lift per RPM). Adapt with approved high-altitude props, reduced payload margins, and shorter legs.
-
Post-flight: don’t charge a cold pack. Warm it gradually (to avoid condensation) and charge only once it’s back in your OEM’s safe temperature range.
Cold weather battery problems: why failure modes change
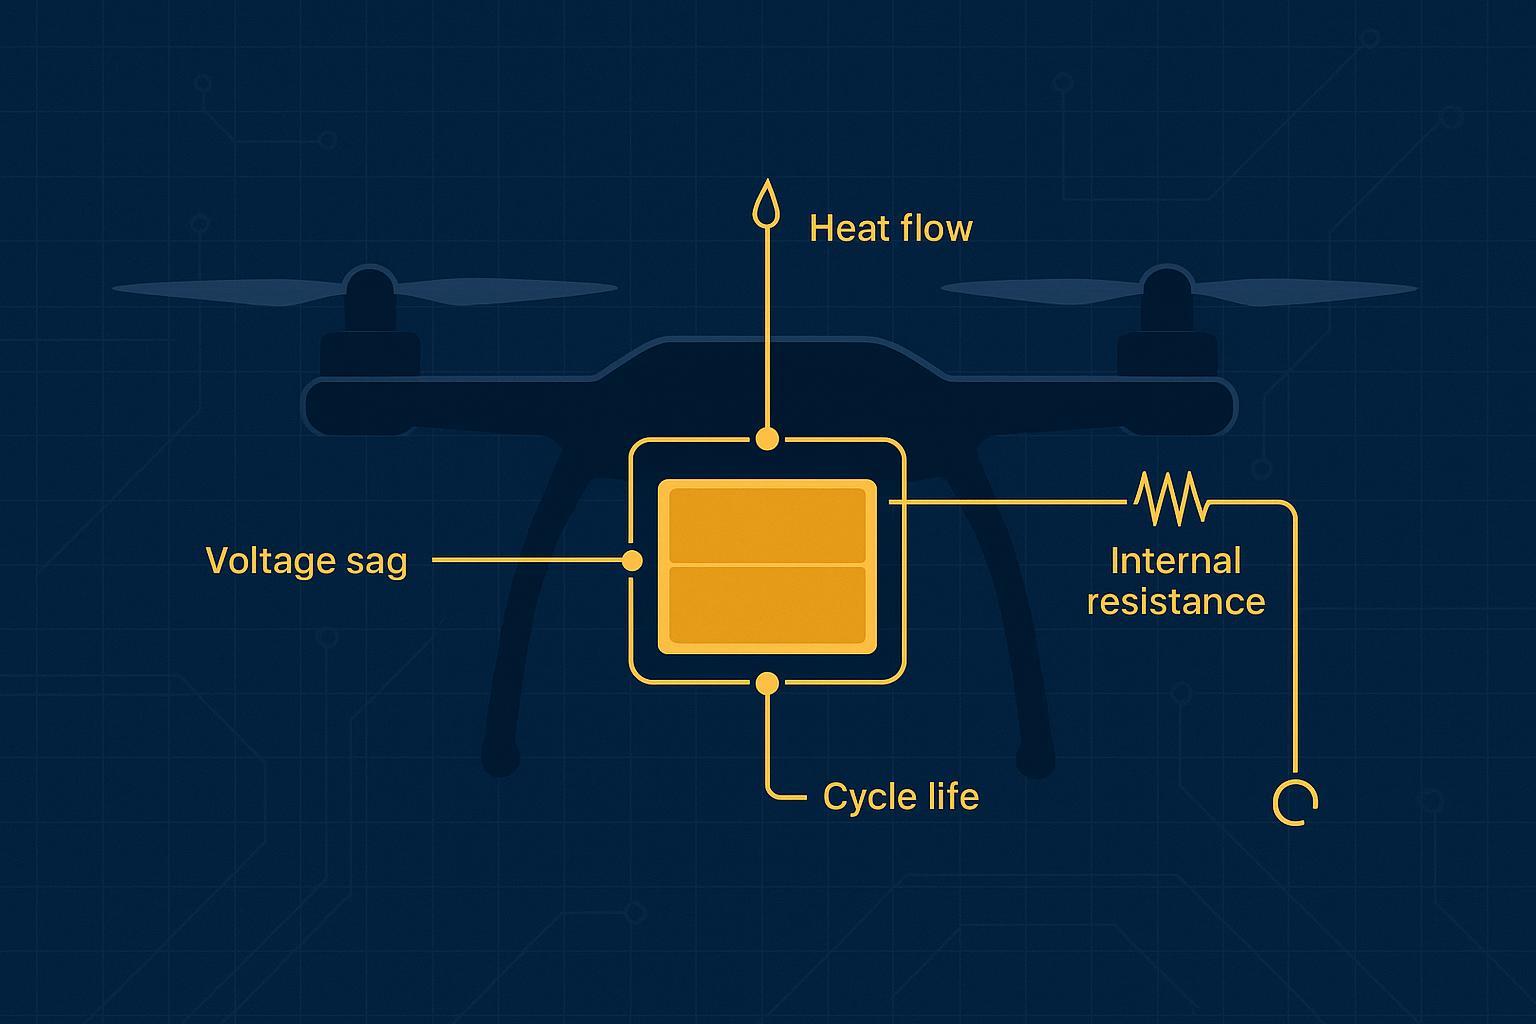
1.Low temperature increases resistance (less usable power)
At low temperature, lithium-ion transport through the electrolyte and into electrode materials slows down. Practically, that means the pack can’t deliver the same current without a larger voltage drop.
It also helps to separate two effects that often get mixed together in incident reports:
-
Energy (capacity) loss: you may get fewer total minutes in the air.
-
Power loss (voltage under load): the pack may still have energy left, but it can’t supply the required current without sag—so protection logic can trigger earlier.
How severe this is is highly dependent on cell chemistry, pack design, age/cycle count, and the mission’s load profile (climb rate, payload, wind). Treat any numeric “cold performance” figure as a typical example, and default to OEM limits for go/no-go decisions.
2.Higher internal resistance triggers drone battery voltage sag and protection events
When internal resistance rises, the same throttle command demands more voltage headroom. The pack voltage sags, and the aircraft interprets that as “battery is empty” even if SOC (percentage) looks acceptable.
This is why cold-weather incidents often show a cliff-like drop: the pack is still holding energy, but can’t deliver it at the required power level.
3.Charging cold batteries increases lithium plating risk
Cold-weather charging is a different risk class than cold-weather discharge. When a lithium battery is charged at low temperature, lithium can deposit as metal on the anode (“lithium plating”), which can accelerate degradation and create internal short risk. Treat “charge only after warming” as a hard rule for fleet SOPs. A general reference discussion of cold-weather lithium plating risk is covered in Renogy’s explainer on why lithium batteries fail in cold weather.
Don’t fast-charge or force-charge a battery that’s still below freezing. Warm it first.
Cold weather drone battery SOP
Step 1 — Preheat: take off with a warm battery
Use a pre-flight rule that is simple enough to enforce:
-
Target: preheat the pack to ~20–25°C (68–77°F).
-
Minimum for takeoff: follow your OEM guidance (commonly >15°C / 59°F for many platforms). DJI Enterprise’s winter guidelines explicitly recommend preheating batteries to over 15°C before takeoff and then hovering to continue warming (DJI Enterprise — Winter Drone Guidelines).
-
Avoid overheating: as a general safety practice, avoid any preheat method that could create hot spots or push the pack anywhere near high temperatures (many crews use ~40°C / 104°F as an informal “do-not-exceed” surface-temperature check, but you should always defer to the battery maker’s limits).
Practical preheat methods (choose based on field constraints):
-
Manufacturer preheaters / self-heating batteries (best control, most repeatable).
-
Vehicle cabin heat (keep the pack out of direct vents; avoid overheating).
-
Insulated sleeve + hand warmer (use a barrier layer; avoid direct contact with cells; confirm temperature via app/telemetry).
Step 2 — Insulate: preserve temperature between preheat and takeoff
Cold kills by time. A warm pack that sits in wind for five minutes becomes a cold pack.
Operational controls:
A simple discipline that improves outcomes: minimize time-to-takeoff after you remove a warmed pack from insulation. If you’re delayed (permits, observers, airspace), re-insulate and re-check temperature before launch.
-
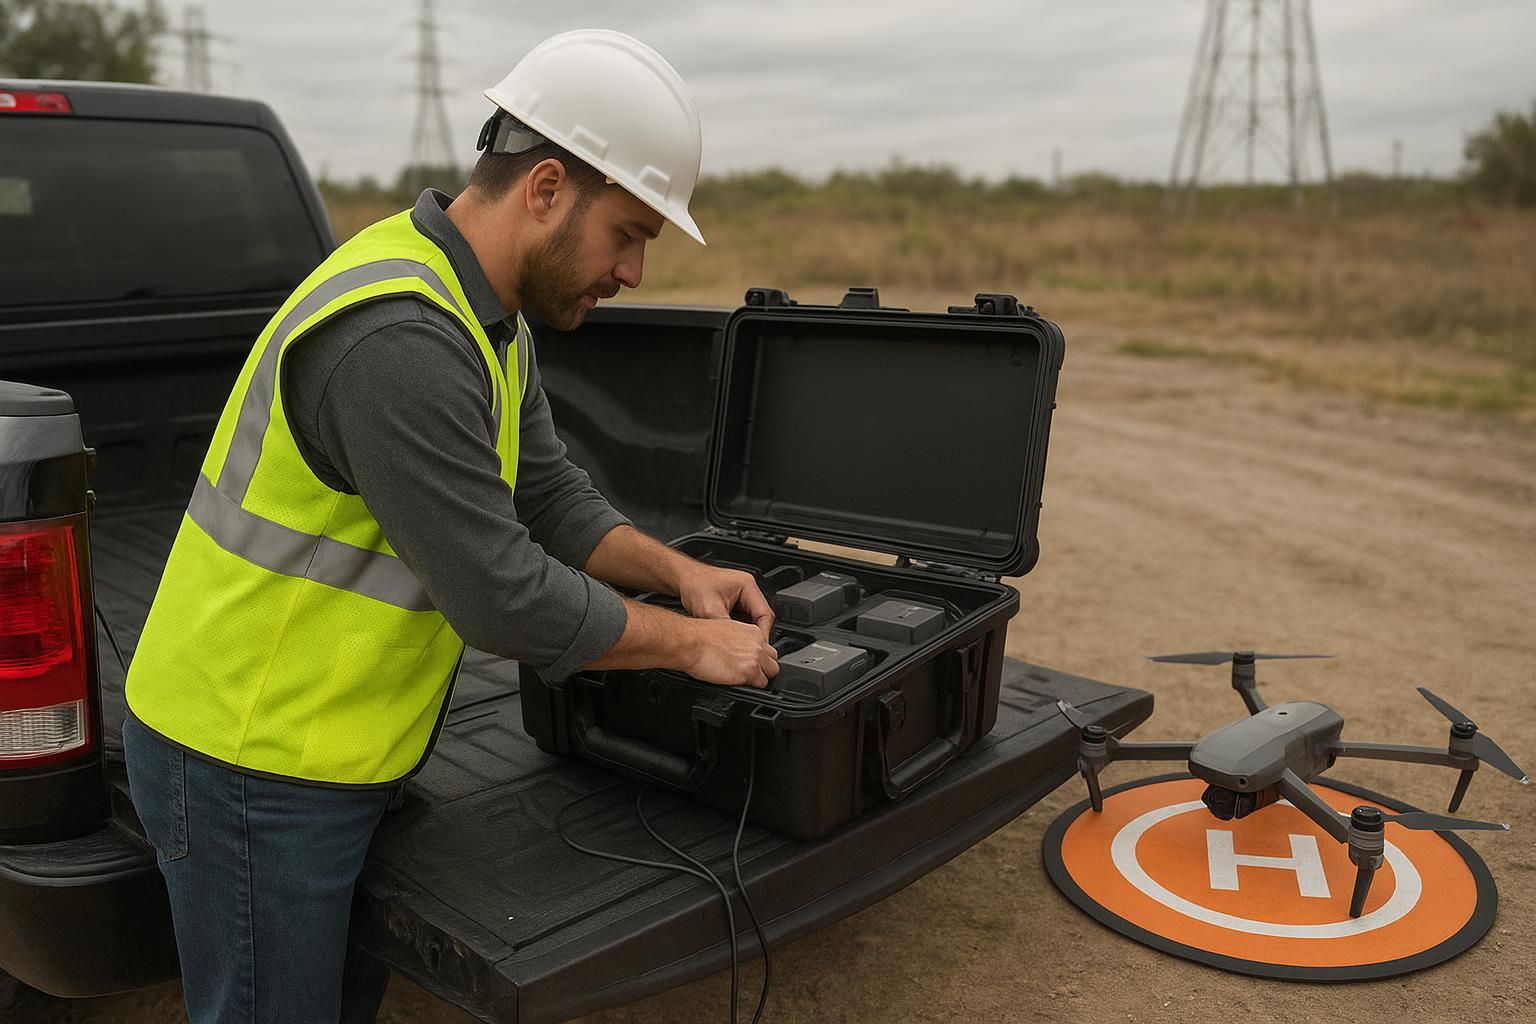
Store spares in an insulated case inside the cabin (not the trunk).
-
Use insulation sleeves during staging and transport.
-
If your operations allow it, stage batteries in a small thermal container so you can swap and fly without long exposure.
Step 3 — Fly gently: avoid power spikes that amplify sag
Cold + altitude is a current-demand multiplier.
Avoid these patterns in the first minutes of flight:
-
full-throttle climbs
-
rapid acceleration/braking
-
repeated “punch-outs” to fight gusts
Replace them with:
-
smooth climb rates
-
stable cruise speeds
-
deliberate turns instead of aggressive yaw snaps
Step 4 — Monitor: define conservative thresholds and enforce early return
Three rules keep fleets out of incident reviews:
-
Warm-up hover: after takeoff, hover at low height for 30–60 seconds (or about one minute) to let the pack and powertrain stabilize. Autel’s cold-weather guidance recommends a hover warm-up until the battery reaches at least 15°C (Autel — Flying Drones in Cold Weather). DJI also recommends hovering for about one minute after takeoff (DJI Enterprise — Winter Drone Guidelines).
-
Flight-time derating: as a starting planning rule, cap each sortie to about 60–70% of your mild-weather duration. Example: if you normally fly 20 minutes at room temperature, plan to be heading home around 12–14 minutes in freezing conditions. Then adjust based on your telemetry (battery temperature, voltage behavior under load), payload, wind, and pack age.
-
Earlier landing / RTH: in cold weather, plan to land earlier than you would in mild conditions. Autel suggests landing around 30–40% remaining rather than draining to low SOC in the cold (Autel — Flying Drones in Cold Weather).
High altitude: power demand rises as batteries get weaker
High altitude reduces air density. To generate the same lift, the propulsion system generally needs more work. The result is higher current draw — exactly what a cold battery is least able to deliver.
In real operations, what matters is density altitude (altitude + temperature + pressure). A cold day at high elevation can still produce demanding power conditions, especially with gusty winds and heavier payloads.
In other words, high altitude drone battery performance is often limited by power delivery (voltage under load), not nameplate capacity.
Use altitude-optimized props when the platform supports it
If your aircraft has manufacturer-approved “high altitude” propellers, treat them as part of the deployment kit. It’s a mechanical way to reduce current demand (and therefore voltage sag risk).
Shorten mission plans and reduce payload margins
At altitude and in cold:
-
shorten legs
-
reduce aggressive maneuver margins
-
assume faster deterioration if wind is present
Go/no-go quick decision rules for cold + altitude flights
Use this as a fast pre-brief. It’s intentionally conservative and should be overridden by your OEM documentation and real-time telemetry.
|
Condition |
Action |
|---|---|
|
Pack is warmed to your target band (commonly ~20–25°C / 68–77°F) and meets your OEM’s minimum takeoff temperature (often >15°C / 59°F) |
GO |
|
Pack is still near-freezing, you can’t verify temperature, or the aircraft shows battery warnings before takeoff |
NO-GO |
|
High wind, heavier payload, or high density altitude is expected |
GO (with limits): shorten legs, derate time further, and avoid aggressive climbs |
|
After takeoff |
Warm-up hover 30–60s and confirm the battery is stabilizing (temperature rising and voltage under load behaving normally) |
|
Mission time planning in freezing conditions |
Start with 60–70% of mild-weather duration per sortie, then adjust based on telemetry and mission load |
|
Return/landing plan |
Aim to be landing around 30–40% remaining rather than running the pack low |
|
Repeated low-voltage warnings, abnormal sag on mild inputs, rapidly falling percentage, or battery temperature trending down instead of up (or approaching your OEM’s lower temperature limits) |
ABORT / return immediately |
To make this audit-friendly, record the go/no-go inputs (ambient temperature, battery start temperature, wind estimate, payload, density altitude) in your flight log.
A field checklist you can standardize across crews
Use this as the minimum SOP checklist. Adjust thresholds to your airframe and pack.
Pre-flight checklist (cold + altitude)
-
Battery physical condition checked (no swelling, damage, or connector oxidation).
-
Battery temperature at start: target 20–25°C, minimum >15°C.
-
Spares stored insulated and warm until install.
-
Aircraft airframe checked for cracks, ice, moisture entry points.
-
Check battery bay doors, gaskets, and latches for proper seating to reduce moisture ingress and condensation issues.
-
RTH/landing plan adjusted for cold (conservative).
In-flight checklist
-
Hover warm-up: 30–60s until pack stabilizes (confirm via telemetry).
-
Avoid power spikes in first minutes.
-
Monitor battery temperature and voltage behavior (not just percentage).
Post-flight checklist
-
Do not charge immediately if the pack is still cold.
-
Allow gradual warm-up in a sealed bag to reduce condensation risk.
-
Charge only once pack is back in a safe temperature band.
Troubleshooting: common cold-weather battery faults and the safe response
Fault 1 — Won’t start, or shuts down right after takeoff
Likely drivers:
-
pack too cold → resistance too high
-
connector oxidation/poor seating
Response:
-
remove and rewarm the pack to a safe preflight temperature band
-
clean and reseat connectors
-
ground any swollen packs; do not re-use
Fault 2 — Cliff-like endurance drop and unstable percentage
Likely drivers:
-
voltage sag under load
-
high-energy flight profile
Response:
-
reduce load (gentler profile, lower speed, avoid climb)
-
return early and treat as a threshold breach event
Fault 3 — Abnormal heating or odor
Likely drivers:
-
internal failure, possibly triggered or accelerated by improper low-temp handling
Response:
-
isolate the pack in a safe, ventilated area
-
do not charge, do not continue flight ops
-
follow your disposal/incident protocol
Post-flight maintenance: how to avoid shortening battery life in winter
1.Warm up gradually to avoid condensation
Move packs from cold air to warm indoor environments in a sealed bag, then let them equilibrate. This reduces condensation on electronics and connectors.
2.Charge only when temperature is safe
Cold charging raises lithium plating risk. Operationally, that means: avoid charging a pack that’s still cold from flight.
As a general rule of thumb for many lithium packs, don’t charge at or below 0°C (32°F) unless your battery/OEM documentation explicitly allows it (some smart batteries will block charging automatically). When in doubt, let the pack warm into a normal indoor temperature range first, then charge at conservative settings per your OEM guidance.
3.Store at a controlled SOC and environment
For longer winter idle periods, store at mid SOC (typically ~40–60% depending on pack guidance) in a dry, stable-temperature environment.
If you’re setting up an audit-friendly storage policy, DJI also recommends storing equipment in a constant indoor environment around 5–20°C after cold-weather flights (DJI Enterprise — Winter Drone Guidelines).
For additional safety context, see Herewin’s explainer on lithium-ion battery safety from a materials perspective and their overview of soft-pack vs cylindrical battery safety tradeoffs.
When you should consider “low-temperature” dedicated batteries
If your mission profile includes repeated flights below freezing, high altitude, and high wind — and the cost of a single crash is unacceptable — battery selection becomes a reliability decision, not just an endurance decision.
Evaluate packs and vendors on:
-
verified low-temperature discharge performance (test method and load profile)
-
BMS low-temp protections and telemetry access
-
consistency across cycles (not just a single fresh-pack test)
-
compliance and shipping certifications appropriate to your operations
Next steps
To build a repeatable fleet program, start by standardizing both battery selection and documentation—and if you’d like help pressure-testing your cold-weather SOP (preheat targets, go/no-go thresholds, and flight-control limits), Herewin can support an evaluation based on your platform, payload, and duty cycle, including low-temperature battery configurations. For industrial UAV power options and customization paths, see Herewin’s drone battery solutions.
PREGUNTAS FRECUENTES
What’s the optimal preheat temperature for cold weather drone batteries?
A practical target is 20–25°C (68–77°F). Manufacturer guidance often sets a minimum takeoff temperature around 15°C (59°F); for example, DJI Enterprise recommends preheating batteries above 15°C in winter operations.
Can I use a hair dryer to preheat a drone battery?
It’s generally not recommended for field SOPs because it’s hard to control heating uniformity and you can overheat local areas. Prefer a manufacturer heater, cabin heat, or an insulated sleeve with controlled warming.
How should I adjust flight time in freezing temperatures?
Plan conservatively. Many crews cap flight time to roughly 60–70% of their mild-weather duration, and some manufacturer guidance suggests landing earlier (for example, around 30–40% remaining) to avoid voltage-sag events.
What changes at high altitude?
Air density is lower, so the aircraft often needs more power to hold lift — increasing current draw. That amplifies voltage sag risk. Adapt with altitude-rated props (when approved), gentler profiles, and shorter legs.
Is it safe to charge immediately after a cold-weather flight?
In general, no. Let the pack warm up gradually to a safe temperature band first. Charging cold lithium batteries increases lithium plating risk and can shorten life or create safety exposure.